# Creating Artworks from Dendrobium Anosmum (Phi Diep Orchids): A Comprehensive Guide

Dendrobium anosmum, commonly known as the Phi Diep orchid, is not just a marvel of nature; it’s also a captivating medium for artistic expression. With its stunning blooms and delicate structure, this orchid can inspire a range of creative projects, from floral arrangements to paintings and crafts. This article will guide you through the various methods of creating artworks from Phi Diep orchids, exploring techniques, materials, and creative ideas.
## 1. Understanding the Beauty of Dendrobium Anosmum
### 1.1 Characteristics of Dendrobium Anosmum
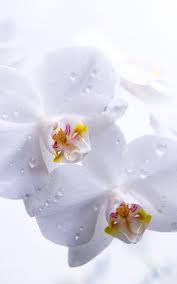
Dendrobium anosmum is an epiphytic orchid native to Southeast Asia. Its elongated stems and clusters of fragrant flowers bloom in various shades, including white, pink, and purple. The vibrant colors and intricate details make it a favorite among artists and floral enthusiasts alike.
### 1.2 Cultural Significance
In Vietnam, the Phi Diep orchid symbolizes beauty, love, and resilience. Its presence in traditional ceremonies and festivals highlights its cultural importance. This significance can add depth to your artwork, infusing it with meaning and emotional resonance.
## 2. Materials Needed for Orchid Artworks
### 2.1 Fresh Flowers
Using fresh Dendrobium anosmum orchids as your primary material will ensure vibrant colors and a lively appearance in your artwork. Ensure that the flowers are freshly cut and free from pests or damage.
### 2.2 Drying Agents (For Dried Arrangements)
If you plan to create dried floral arrangements or pressed flower art, you will need drying agents such as silica gel or air-dry methods to preserve the orchids effectively.
### 2.3 Adhesives
Depending on your project, you may need various adhesives. Floral glue is ideal for arrangements, while craft glue or hot glue can be used for other types of artwork.
### 2.4 Canvas or Paper
For painting or pressed flower art, choose high-quality watercolor paper or canvas to ensure your artwork lasts.
### 2.5 Tools and Accessories
Gather the necessary tools, including scissors, wire cutters, tweezers, and floral foam for arrangements. For painting, have brushes, palettes, and watercolors or acrylic paints on hand.
## 3. Techniques for Creating Artworks from Dendrobium Anosmum
### 3.1 Floral Arrangements
#### 3.1.1 Materials
– Fresh Dendrobium anosmum orchids
– Greenery (ferns, leaves, etc.)
– Floral foam or a vase
– Floral tape and wire
#### 3.1.2 Steps
1. **Preparation**: Start by cutting the stems of the orchids at an angle to promote water absorption. Remove any leaves that will be submerged in water.
2. **Designing the Arrangement**: Choose a color palette that complements the orchids. Arrange greenery in your floral foam or vase first to create a lush background.
3. **Inserting the Orchids**: Begin placing the orchids into the arrangement. Start with the larger blooms, positioning them at varying heights to create depth.
4. **Securing the Flowers**: Use floral tape to secure stems in place if necessary. Adjust the flowers until you achieve a balanced look.
5. **Finishing Touches**: Add smaller flowers or additional greenery to fill gaps. Ensure all stems are submerged in water if using fresh flowers.
### 3.2 Pressed Flower Art
#### 3.2.1 Materials
– Fresh Dendrobium anosmum flowers
– Heavy books or a flower press
– Watercolor paper or cardstock
– Craft glue
#### 3.2.2 Steps
1. **Selecting and Preparing Flowers**: Choose healthy flowers, ideally in full bloom. Remove excess foliage and prepare the petals for pressing.
2. **Pressing the Flowers**: Place the flowers between sheets of parchment paper and press them in a heavy book or flower press. Leave them for 1-2 weeks until completely dried.
3. **Arranging on Paper**: Once dried, arrange the pressed flowers on watercolor paper or cardstock. Play with different compositions until you find one that resonates.
4. **Gluing**: Carefully glue the pressed flowers to the paper, applying a thin layer of glue to avoid saturation. Let it dry completely.
5. **Framing or Displaying**: Consider framing your pressed flower art to preserve it and enhance its visual appeal.
### 3.3 Painting with Orchids
#### 3.3.1 Materials
– Fresh Dendrobium anosmum orchids for reference
– Watercolor or acrylic paints
– Brushes of various sizes
– Canvas or watercolor paper
#### 3.3.2 Steps
1. **Choosing a Subject**: Select a composition based on the orchids’ structure and colors. Consider a close-up of a bloom or a wider view that includes multiple flowers.
2. **Sketching**: Lightly sketch the outline of your composition on the canvas or paper. Focus on capturing the shapes and proportions accurately.
3. **Painting the Background**: Start with the background, using light washes of color. This sets the tone for the artwork and helps the orchids stand out.
4. **Adding Details**: Begin painting the orchids, layering colors to create depth. Pay attention to the flowers’ intricate details, including gradients and highlights.
5. **Finishing Touches**: Add final details, such as shadows and highlights, to enhance the overall composition. Let the painting dry completely before displaying it.
### 3.4 Creating Orchid Crafts
#### 3.4.1 Orchid Jewelry
**Materials Needed**: Dried orchid petals, resin, jewelry findings (chains, hooks), and a mold.
1. **Preparing the Flowers**: Dry the Dendrobium anosmum flowers using silica gel or air-drying methods.
2. **Mixing Resin**: Follow the instructions for your resin, mixing it thoroughly to avoid bubbles.
3. **Creating Jewelry**: Pour a small amount of resin into your mold, place the dried petals, and cover with more resin. Allow it to cure as per the product instructions.
4. **Finishing**: Once cured, remove from the mold, attach findings, and your orchid jewelry is ready to wear!
#### 3.4.2 Orchid Wreaths
**Materials Needed**: Fresh or dried orchids, a wreath base (foam or twig), floral wire, and greenery.
1. **Preparing the Base**: Start with a sturdy wreath base. If using a foam base, cover it with greenery to provide a lush backdrop.
2. **Attaching Flowers**: Use floral wire to secure orchids to the base, starting from the outer edge and working your way in. Fill in gaps with additional greenery and flowers.
3. **Finishing Touches**: Add ribbon or other decorative elements to enhance the wreath’s aesthetic. Hang it up or display it as a centerpiece.
## 4. Inspiring Ideas for Orchid Art Projects
### 4.1 Seasonal Displays
Create seasonal arrangements featuring Dendrobium anosmum to celebrate different times of the year. For instance, pair it with autumn leaves for a fall display or vibrant colors for summer.
### 4.2 Home Decor
Incorporate orchid art into your home decor. Consider framing paintings or creating wall art with pressed flowers. You can also use arrangements as centerpieces or in wall-mounted vases.
### 4.3 Gifts and Keepsakes
Orchid artworks make thoughtful gifts for loved ones. Create custom arrangements or pressed flower cards for birthdays, anniversaries, or other special occasions.
### 4.4 Workshops and Community Events
Host workshops to share your knowledge of creating orchid art. Engaging with the community can inspire others to appreciate the beauty of Dendrobium anosmum and foster a love for floral art.
## 5. Caring for Dendrobium Anosmum
### 5.1 Aftercare for Fresh Arrangements
To prolong the life of fresh arrangements, change the water regularly, trim the stems, and keep the flowers in a cool, shaded area. This will ensure that your orchids remain vibrant for as long as possible.
### 5.2 Preserving Dried Flowers
If you’ve used dried Dendrobium anosmum in your artwork, store them in a cool, dry place away from direct sunlight to prevent fading and deterioration.
## 6. Conclusion
Creating artworks from Dendrobium anosmum (Phi Diep orchids) is a rewarding and fulfilling endeavor that allows you to explore your creativity while celebrating the beauty of nature. Whether through floral arrangements, pressed flower art, paintings, or crafts, there are endless possibilities to express your artistic vision.
By understanding the unique characteristics of the Phi Diep orchid and employing various techniques, you can create stunning pieces that not only showcase your talent but also reflect the cultural significance of this remarkable flower. Embrace your creativity, and let the elegance of Dendrobium anosmum inspire your next artistic project!

