# How to Identify When Dendrobium Anosmum (Phi Diep Orchid) Needs Repotting

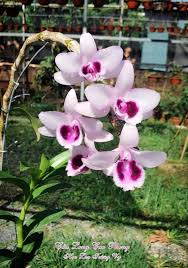
Dendrobium anosmum, commonly known as the Phi Diep orchid, is a stunning and aromatic orchid species cherished for its vibrant flowers and graceful growth habits. Like all orchids, Dendrobium anosmum requires specific care to thrive, and one critical aspect of this care is repotting. Understanding when to repot your Phi Diep orchid can significantly impact its health and flowering potential. This comprehensive guide will explore the signs that indicate it’s time to repot your Dendrobium anosmum, the best practices for repotting, and tips for maintaining a healthy orchid.
## 1. Importance of Repotting
### 1.1 Maintaining Plant Health
Repotting is essential for maintaining the overall health of Dendrobium anosmum. Over time, the growing medium can break down, lose its ability to retain moisture, and become compacted, which can impede root growth and water absorption. Fresh potting media provides essential nutrients and aeration that promote healthy root development.
### 1.2 Encouraging Growth and Flowering
Regular repotting helps to encourage new growth and flowering in Dendrobium anosmum. A healthy root system is vital for the orchid to absorb the necessary nutrients and water required for robust growth and vibrant blooms.
### 1.3 Preventing Diseases and Pests
Old, decaying potting media can harbor pests and diseases, which can harm your orchid. Repotting allows you to inspect the roots and remove any affected areas, minimizing the risk of infestations or infections.
## 2. Signs That Dendrobium Anosmum Needs Repotting
### 2.1 Root System Observation
#### 2.1.1 Root Overcrowding
One of the most evident signs that your Dendrobium anosmum needs repotting is root overcrowding. If you notice roots growing out of the drainage holes or wrapping around the outside of the pot, it’s time to consider repotting. Orchids thrive when their roots have space to grow, and overcrowding can lead to stunted growth and poor health.
#### 2.1.2 Root Rot
Inspect the roots for signs of rot, which typically appears as brown, mushy, or black roots. Healthy orchid roots are firm and green or silvery in color. If you discover any rotting roots, repotting is necessary to remove the damaged sections and provide a fresh growing medium.
### 2.2 Degradation of Growing Medium
#### 2.2.1 Breakdown of Potting Media
Over time, the potting medium can break down and become compacted. If you notice that the medium feels dense, retains too much moisture, or has lost its structure, it may not provide the proper aeration that Dendrobium anosmum requires. Repotting into fresh medium will help restore the orchid’s growing conditions.
#### 2.2.2 Foul Odor
A foul or sour smell emanating from the pot can indicate that the potting medium is decomposing. This condition can lead to root rot and other problems. If you detect such an odor, it’s a clear sign that your orchid needs repotting.
### 2.3 Plant Growth Patterns
#### 2.3.1 Stunted Growth
If your Dendrobium anosmum shows signs of stunted growth or fails to produce new shoots or leaves, it may be a sign that it’s time to repot. A lack of growth can indicate that the roots are restricted and unable to absorb sufficient nutrients and moisture.
#### 2.3.2 Flowering Issues
A healthy orchid should produce flowers during its blooming season. If your Dendrobium anosmum is not flowering or producing fewer flowers than usual, repotting might help rejuvenate the plant and encourage blooming.
### 2.4 Pot Condition
#### 2.4.1 Cracks or Damage
Examine the pot for cracks, chips, or damage. If the pot is broken or compromised, it may not support the plant adequately. In such cases, repotting into a new, sturdy pot will provide better support and prevent further damage.
#### 2.4.2 Size of the Pot
As your orchid grows, it may outgrow its pot. If the pot appears too small or cramped, it’s time to repot into a larger container. Generally, orchids should be repotted into a pot that is one size larger than the current one.
## 3. Best Time to Repot Dendrobium Anosmum
### 3.1 Seasonal Considerations
Dendrobium anosmum is best repotted during its active growth phase, typically in spring after flowering. This timing allows the plant to recover quickly and adjust to its new environment.
### 3.2 After Flowering
Repotting immediately after the blooming period is ideal, as the orchid can focus its energy on root establishment and new growth. Avoid repotting during the dormant phase (fall and winter) when the plant is not actively growing.
## 4. How to Repot Dendrobium Anosmum
### 4.1 Materials Needed
Before you begin the repotting process, gather the necessary materials:
– Fresh orchid potting mix (bark-based mix is ideal for Dendrobium anosmum)
– A pot that is one size larger than the current pot
– Pruning shears or scissors (sterilized)
– Optional: charcoal or perlite for improved drainage
### 4.2 Step-by-Step Repotting Process
#### 4.2.1 Remove the Orchid from Its Pot
1. Gently grasp the base of the Dendrobium anosmum and carefully pull it out of the pot.
2. If the roots are stuck, you can gently tap the sides of the pot or use a sterilized knife to loosen the edges.
#### 4.2.2 Inspect the Roots
1. Examine the root system, looking for any signs of damage, rot, or overcrowding.
2. Trim away any brown, mushy, or damaged roots using sterilized pruning shears.
#### 4.2.3 Prepare the New Pot
1. Place a layer of fresh potting mix at the bottom of the new pot.
2. If desired, add a layer of charcoal or perlite to improve drainage.
#### 4.2.4 Position the Orchid in the New Pot
1. Place the Dendrobium anosmum in the center of the new pot, ensuring that the roots are spread out evenly.
2. Fill in around the roots with the fresh potting mix, gently pressing down to eliminate air pockets.
#### 4.2.5 Water the Orchid
1. After repotting, water the orchid thoroughly to help settle the medium around the roots.
2. Ensure excess water drains out of the bottom of the pot.
#### 4.2.6 Provide Care Post-Repotting
1. Place the repotted orchid in a shaded area for a few weeks to allow it to acclimate.
2. Avoid direct sunlight until the orchid shows signs of new growth.
3. Resume regular care, including proper watering and fertilization.
## 5. Tips for Maintaining a Healthy Dendrobium Anosmum Post-Repotting
### 5.1 Monitor Environmental Conditions
Keep a close eye on temperature, humidity, and light levels in the days and weeks following repotting. Ensure that the conditions are optimal for your Dendrobium anosmum to thrive.
### 5.2 Watering Practices
After repotting, allow the top layer of the potting mix to dry out slightly before watering again. This will help the roots establish without the risk of overwatering.
### 5.3 Fertilization
Resume fertilization after a month of repotting. Use a balanced orchid fertilizer diluted to half strength to promote healthy growth.
### 5.4 Be Patient
It may take some time for your Dendrobium anosmum to adjust to its new pot. Be patient and avoid unnecessary stress to the plant during this period.
## 6. Conclusion
Repotting Dendrobium anosmum is an essential aspect of orchid care that significantly impacts the plant’s health and blooming potential. By recognizing the signs that indicate it’s time to repot and following the proper procedures, you can ensure your Phi Diep orchid remains healthy and vibrant for years to come. Remember to monitor your plant’s growth and environmental conditions regularly to maintain optimal health.
Incorporating these practices into your orchid care routine will foster a flourishing environment for your Dendrobium anosmum, allowing it to thrive and reward you with its breathtaking flowers and enchanting fragrance. By understanding the importance of repotting and being attentive to your orchid’s needs, you can create a nurturing environment that promotes healthy growth and vibrant blooms.

